How to activate ‘Developer options’ on your Android smartphone

At MobileSyrup, we often write stories and how-to articles that reference something called ‘Developers options.’
It’s a hidden menu in the Settings app of Android phones that contains a variety of useful options like USB debugging, the ‘show taps’ ability and more.
For the most part, you’ll never need this menu as most of the options and settings are useful for developers and that’s about it. However, once in a while, it’s useful for us regular folks to have access to it too. For example, you need USB debugging turned on if you want to sideload an update using ADB on your PC. You can turn it on with Developer Options. Or, on the Pixel 4, the Developer options menu includes settings to control when the 90Hz display comes on.
Since we reference it a lot at MobileSyrup, we thought it’d be helpful to have one simple guide to accessing Developer options on most Android phones. While this won’t be a comprehensive guide for every phone, it will show some of the more popular Android devices.
The steps are more or less the same across the board, with subtle differences based on Settings app layout and customization. One thing that remains consistent across all devices is that if you have a lock on your phone, you’ll have to type in your PIN when you activate Developer options.
With that said, let’s dig in.
Pixel
Accessing the Developer options menu on Pixel is probably the simplest and most comparable across devices. Any Android One phone or devices with similar layouts to the Pixel — Nexus devices (RIP) or the Essential phone — should have Developers options in the same place.
Open up the Settings menu on your Pixel and scroll to the bottom. Tap ‘About phone.’ Scroll down again to the ‘Build number’ at the bottom of the About phone menu. Finally, tap the Build number multiple times. You should see a pop-up that reads “You are X taps away from being a developer,” or something similar to that. Keep tapping until the pop-up says you’re a developer.
Once done, go back to the main Settings page and tap System > Advanced. Developer options should be the second-last option, just above ‘System update.’ You can now access it. If you want to turn off Developer options, you can do so from a toggle within the menu, but you’ll need to repeat these steps to turn it on again.
While some of the settings in Developer options may sound interesting, it’s probably best not to touch them unless you know what they do, or you’re a developer.
Samsung

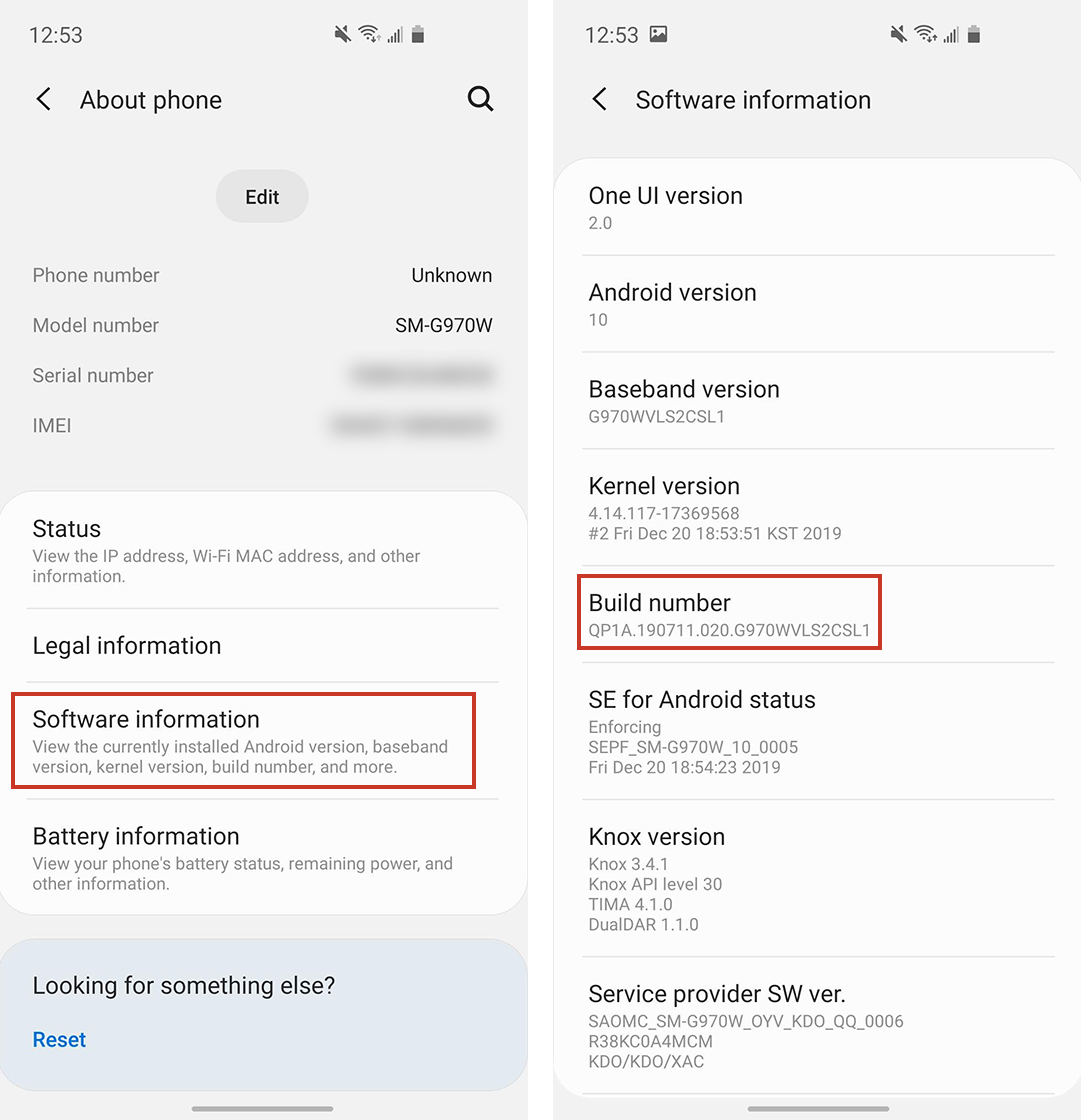
Things are a little different on Samsung phones, but not significantly different. For this guide, we’re using a Galaxy S10e with One UI 2.0. It may look different on an older Samsung phone with a different UI.
Again, head to the Settings app and scroll to the bottom. Tap About phone > Software information. The Build number should be a few options down in the middle of the screen.
Tap Build number repeatedly until it says you’re a developer, then back out to the main Settings menu. Developer options should now be the last item at the bottom of the menu.
OnePlus

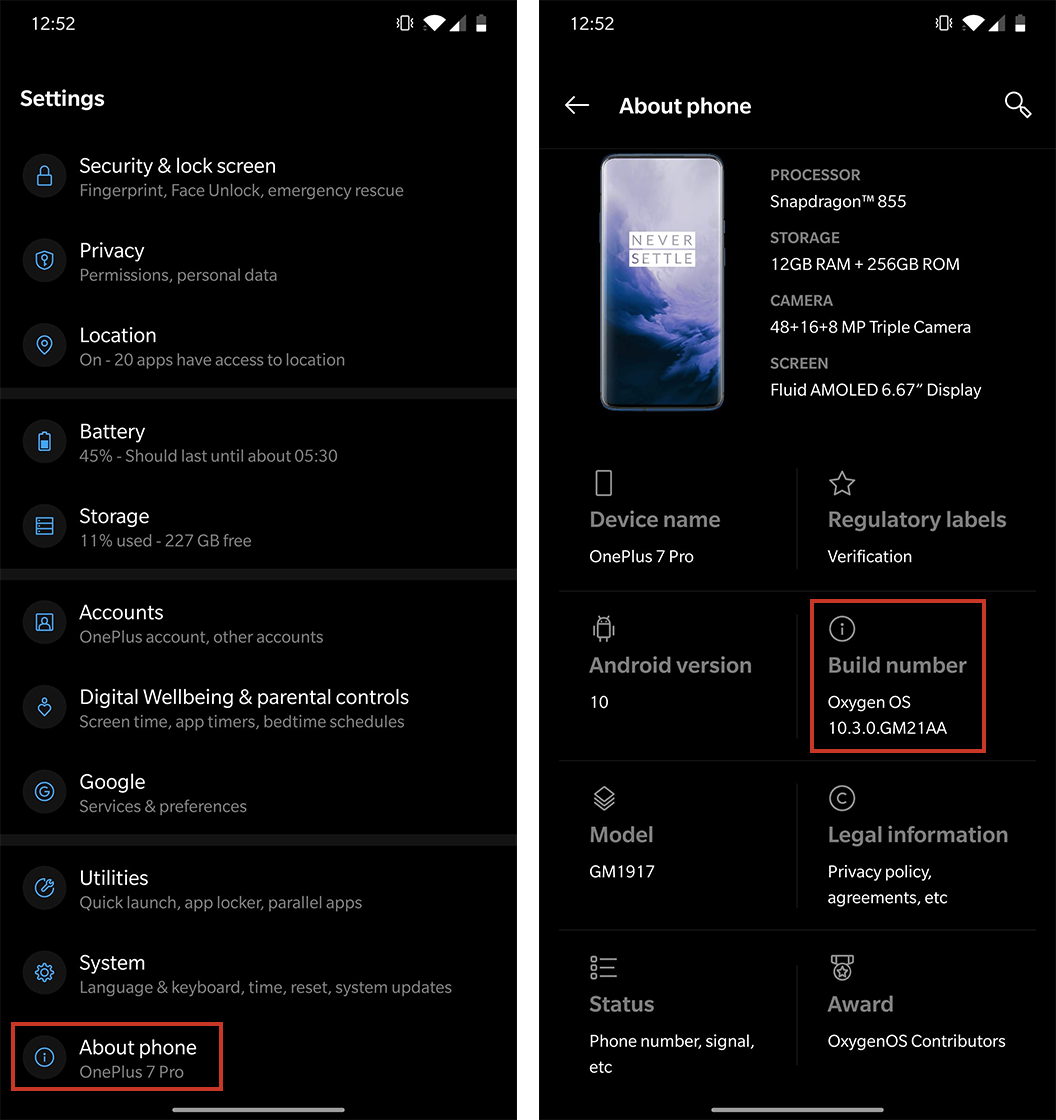
OnePlus also keeps accessing Developer options simple. Open Settings, scroll to the bottom and tap About phone. Tap the Build number until you’re a developer.
Then back out to the main menu and tap System. Developer options should be towards the bottom of this screen.
Huawei

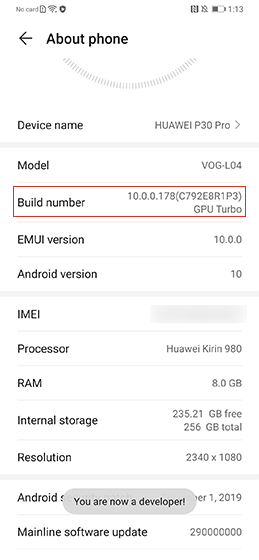
Huawei keeps the process fairly simple as well, thankfully. To enable Developer options, head to Settings > About phone and tap on the build number.
Once activated, you’ll find Developer options under System & Updates.
LG

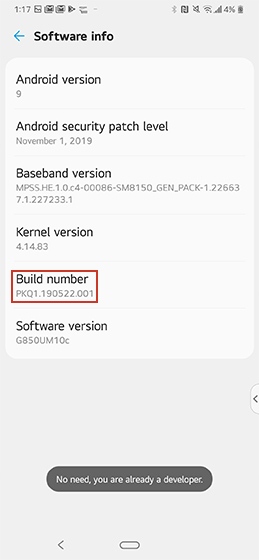
LG, unfortunately, makes things a little bit more complicated. You’ll find the Build number in Settings under System > About phone > Software info.
Again, tap the Build number repeatedly until the phone tells you that you’re a developer. Then head back to the System menu to access Developer options.
The post How to activate ‘Developer options’ on your Android smartphone appeared first on MobileSyrup.
from MobileSyrup https://ift.tt/2NIKVCy
Labels: MobileSyrup
0 Comments:
Post a Comment
Subscribe to Post Comments [Atom]
<< Home