How To Connect Wireless Printer To Laptop
Unable to connect your wireless printer to your laptop? Finding an alternative way to connect your laptop with the printer? If so, then you have landed at the right place.
Having a printer is quite necessary nowadays if you frequently need printing files from the computer as it saves you from the higher printing price in the market. But connecting to the printer might be tricky for you if you have a wireless printer. As the traditional USB printer can be connected easily via USB cable but wireless printer needs a little more efforts in connecting to the laptop or computer.
Must visit: How To Make Money By Keeping Your Computer ON
But not anymore as with the below ways for connecting a wireless printer to your laptop will help you a lot. So, let’s have a look at the various ways on how to connect a wireless printer to your laptop.
Top Best Ways To Connect Your Wireless Printer To Laptop
I. Connect Your Wireless printer To Windows
This method of connecting a wireless printer to your laptop is by connecting directly to the Windows. Follow the below instructions to connect your wireless laptop to Windows 10.
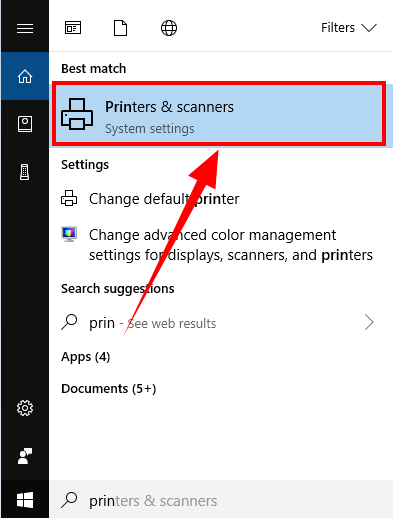
- First of all, in your windows search box, type printer. It will provide you a search result, Printer & Scanner. You need to click on it.
- Now open your Printer and connect it to your WiFi or local internet network. This process may vary system to system as well as printer to printer. But I can provide you with some information to make it easier for you.
- So, for the wireless printer, you have to use the printer screen and choose your WiFi network for connecting. If you have secured it with a password then enter the password of the network to connect the printer to it.
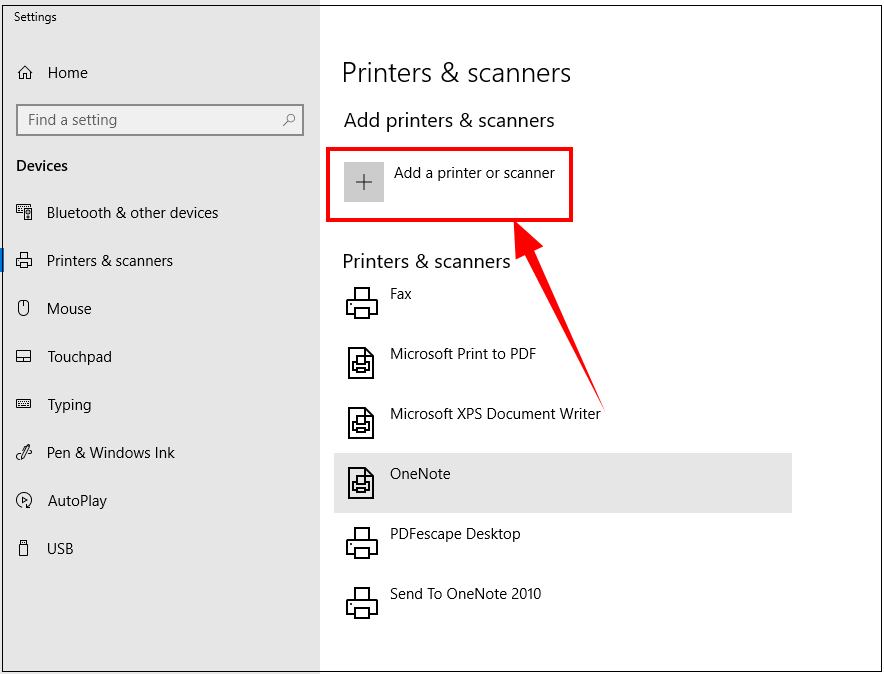
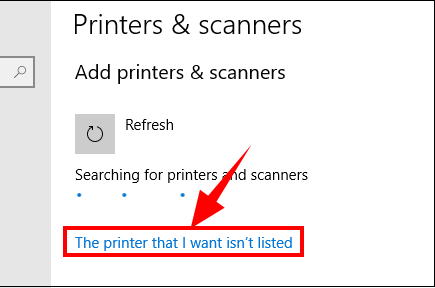
- Once the printer is connected to your WiFi then you need to connect Windows to the network printer. So, on your system, in the Printer&scanner window, simply click on add printer option.
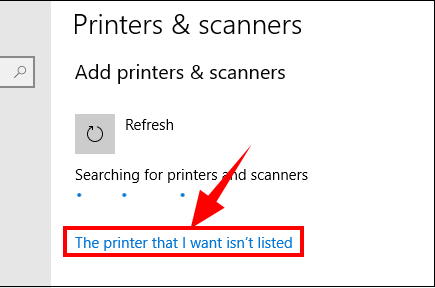
- You have to click on “printer that I want isn’t listed” option.
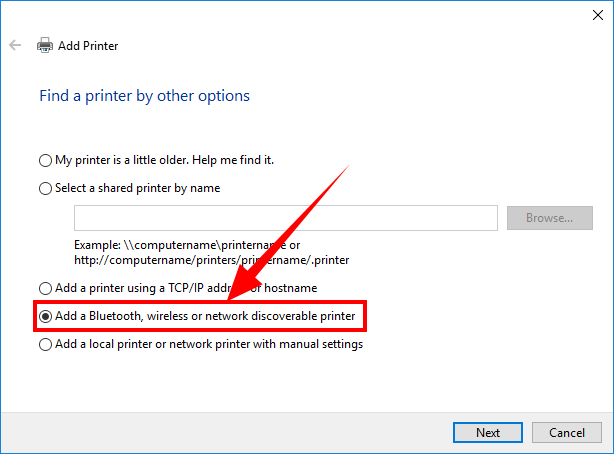
- In the new window, you would see several options to add a printer. From the given ones, choose Add a network, wireless or Bluetooth printer and hit the next button.
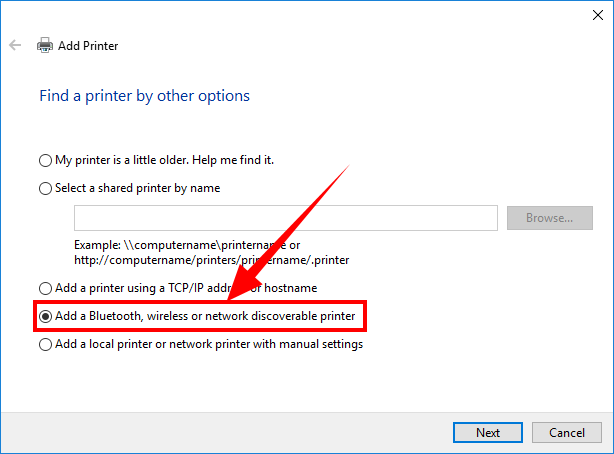
- It will start scanning the available printers. When you see your network printer, click on it to connect to your laptop. That’s all you have to do and your laptop will be connected to the wireless printer with ease.
II. Using Homegroup
You can also share the printer between your computers. In this method, you can connect the printer to your computer and then share it with your laptop. Unfortunately, you can no more create or join HomeGroup in Windows 10. Well, it is not that complicated as it seems. Below are the complete steps for the same.
- First, you have to connect the printer to your computer or the device which is always on. So, if your printer is wireless then you can connect it as explained in the above option or the normal printer can be connected just by plugging in the USB.
- Once, your computer is connected to the computer, go to HomeGroup on your Windows. In the search box, type HomeGroup and click on the search result.
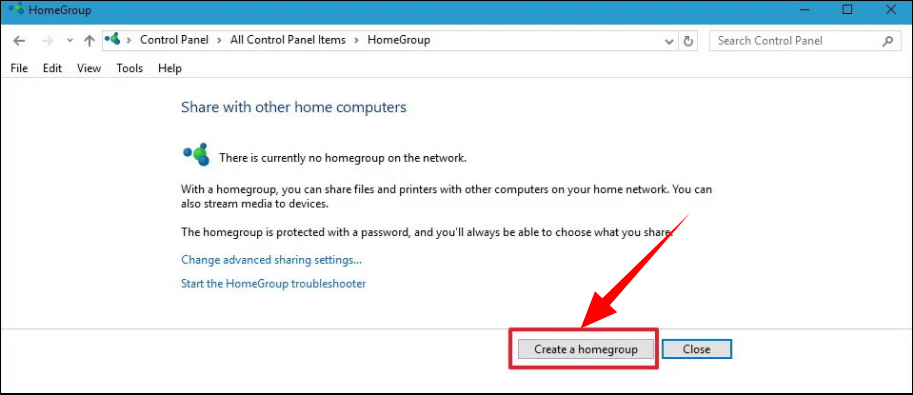
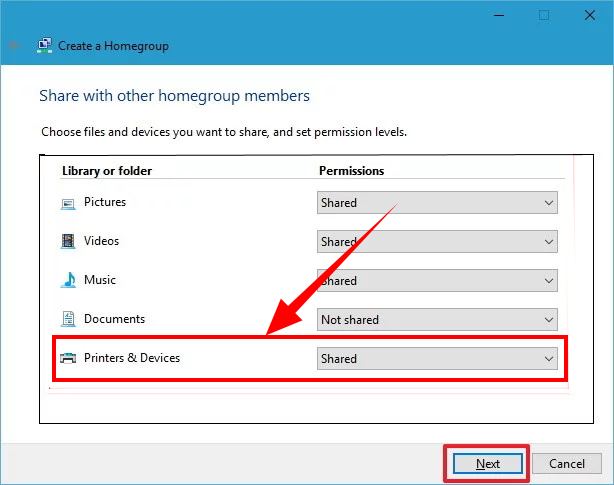
- Now, you need to follow some instructions in order to prompt the HomeGroup. You have to make sure that you have enabled Printers & Devices to be shared.
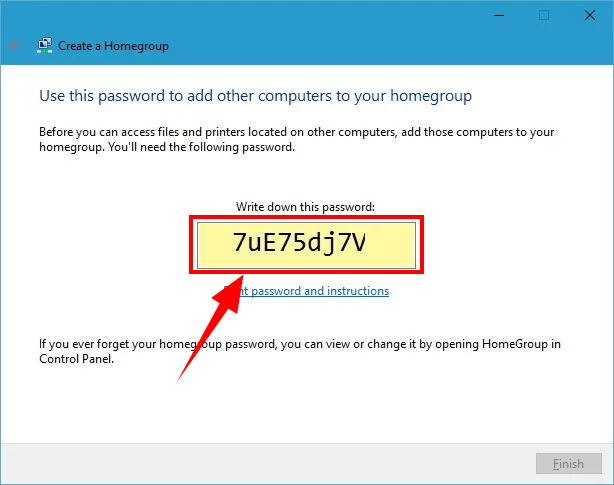
- It will then provide you the password of the HomeGroup which would be required by the other systems to join the homegroup.
- Now, on your laptop, go to the HomeGroup section. Here you have to join the HomeGroup as it is already created on the computer. So, click on the Join Now button. It would ask you to select the homegroup you want to get connected to and then simply enter the password in it.
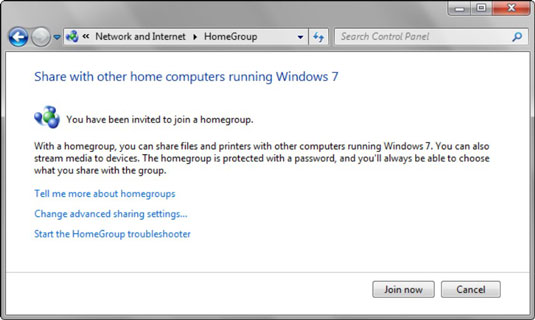
- Now you can use the printer as if it is directly connected to your laptop. Whenever you need to print anything, simply hit the print button available in the print dialogue box of any program.
III. Using Printer Sharing Feature
If you are unable to connect your wireless printer to the laptop and also the HomeGroup option is not working, then don’t worry here is another solution for you.
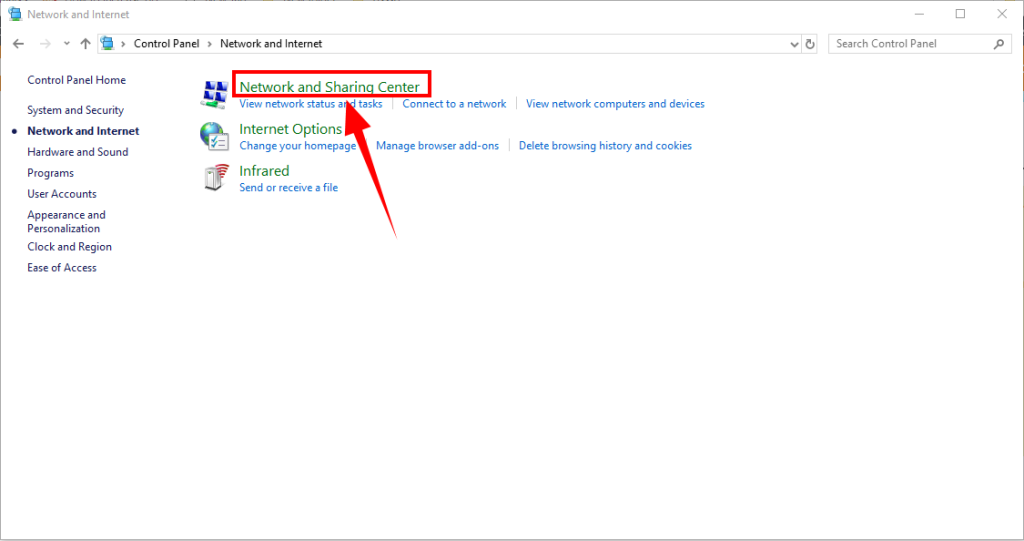
- For this, on your computer to which your printer is already connected, open “Network and Sharing Center” from the search box.
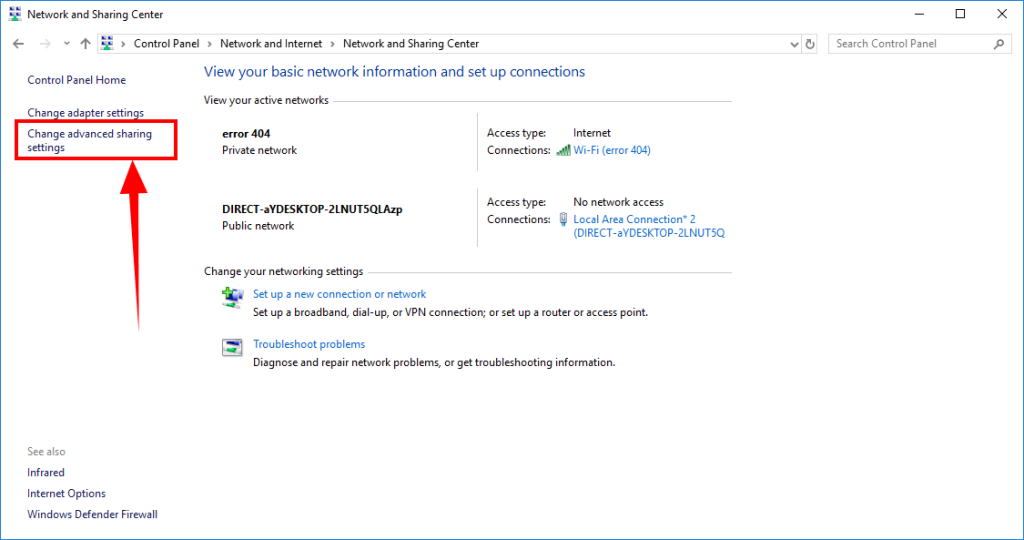
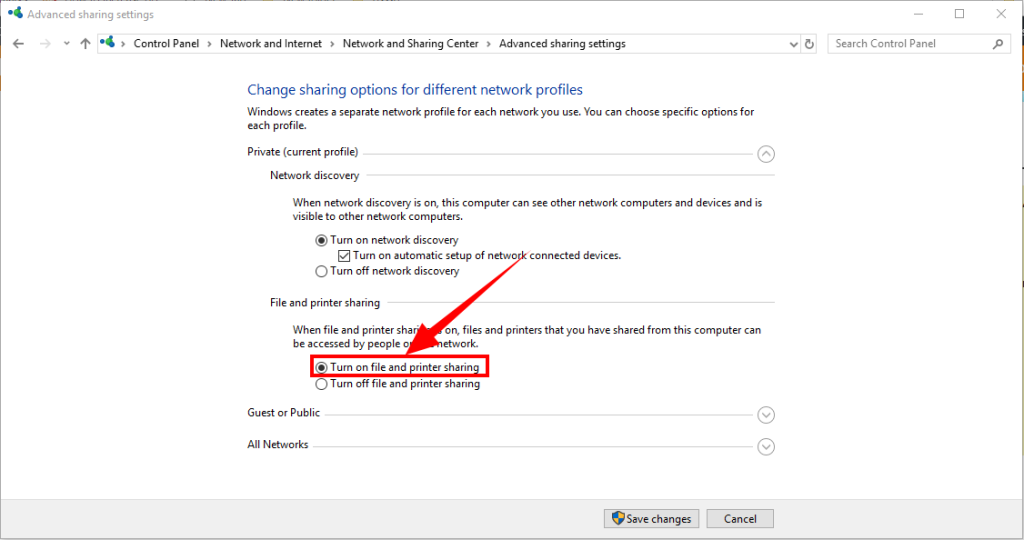
- Now you have to select “Change advanced sharing settings”. In the private section, you would see an option to turn on printer sharing option. So check it and save the changes.
- Now in View devices and printer section in the control panel, right click on the printer and then choose printer properties.
- Here you have to check the Share this printer option in the sharing tab.
- Now you can install the shared printer on your laptop. For the same, go to Devices and Printers on your laptop’s control panel.
- Select, Add a printer option. And then choose to Add a network, wireless or Bluetooth printer option.
- At last, choose the printer from the given list of the available printers.
So, these were the top 3 ways to connect your laptop to a wireless printer. Hope the article was helpful for you.
Read Full Article Here - How To Connect Wireless Printer To Laptop
from TechGYD.COM http://bit.ly/2Jzux7h
Labels: TechGYD.COM
0 Comments:
Post a Comment
Subscribe to Post Comments [Atom]
<< Home